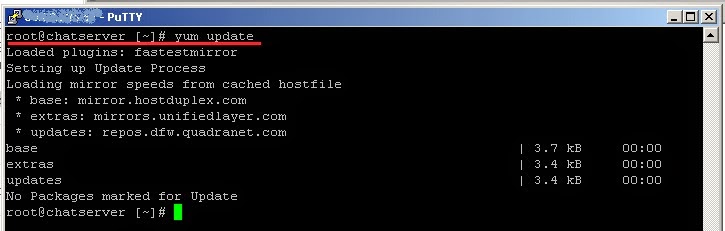
Step 1 - First of all, update your server.
Step 2 - Then, search for if any older JDK versions are installed in your system.
root@chatserver [~]# rpm -qa | grep -E '^open[jre|jdk]|j[re|dk]'
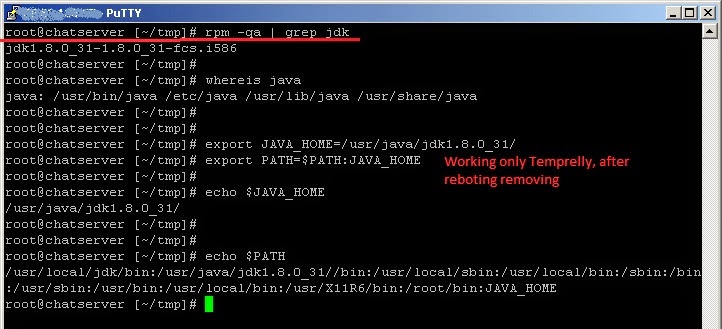
root@chatserver [~]# rpm -qa | grep jdk
Step 3 - To check the already installed Java version, enter the following command:
root@chatserver [~]# java -version
-bash: java: command not found
Step 4 - If Java 1.6 or 1.7 have been installed already, you can uninstall them using the following commands.
root@chatserver [~]# yum remove java-1.6.0-openjdk
root@chatserver [~]# yum remove java-1.7.0-openjdk
root@chatserver [~]# rpm -ev jdk-8u31-linux-i586.rpm
Step 5 - Download And Install Oracle Java JDK on you PC
Go to the "Oracle Java download page" and download the required version depending upon your distribution architecture and install the java package or Use "wget".
"wget http://download.oracle.com/otn-pub/java/jdk/8u31-b13/jdk-8u31-linux-i586.rpm"
"wget http://download.oracle.com/otn-pub/java/jdk/8u31-b13/jdk-8u31-linux-i586.rpm"
root@chatserver [~/tmp]# cd tmp/
root@chatserver [~/tmp]# wget http://download.oracle.com/otn-pub/java/jdk/8u31-b13/jdk-8u31-linux-i586.rpm
root@chatserver [~/tmp]# rpm -ivh jdk-8u31-linux-i586.rpm
root@chatserver [~/tmp]# rpm -ivh jdk-8u31-linux-i586.rpm

Step 6 - Now, check for the installed JDK version in your system using command:
root@chatserver [~/tmp]# java -version
java version "1.8.0_31"
Java(TM) SE Runtime Environment (build 1.8.0_31-b13)
Java HotSpot(TM) Client VM (build 25.31-b07, mixed mode, sharing)
Step 7 - We can easily set the environment variables using the "export" command as shown below.
Note : This method is not recommended. Because, the path will be disappeared when the system reboots.
root@chatserver [~/tmp]# export JAVA_HOME=/usr/java/jdk1.8.0_31/
root@chatserver [~/tmp]# export PATH=$PATH:JAVA_HOME
Step 8 - Now, let us check for the environment variables using commands:
root@chatserver [~/tmp]# echo $JAVA_HOME
/usr/java/jdk1.8.0_31/
root@chatserver [~/tmp]# echo $PATH
/usr/local/jdk/bin:/usr/java/jdk1.8.0_31//bin:/usr/local/sbin:/usr/local/bin:/sbin:/bin:/usr/sbin:/usr/bin:/usr/local/bin:/usr/X11R6/bin:/root/bin:JAVA_HOME
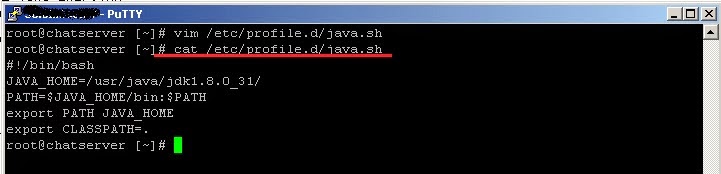
Step 9 - To make it permanent, you have to add the paths in the system wide profile.To do that, create a file called java.sh under /etc/profile.d/ directory.
root@chatserver [~]# vim /etc/profile.d/java.sh
#!/bin/bash
JAVA_HOME=/usr/java/jdk1.8.0_31/
PATH=$JAVA_HOME/bin:$PATH
export PATH JAVA_HOME
export CLASSPATH=.
Step 10 - Make it executable using command:
root@chatserver [~]# chmod +x /etc/profile.d/java.sh
Step 11 - Then, set the environment variables permanently by running the following command:
root@chatserver [~]# source /etc/profile.d/java.sh
That’s it......
Nice Article! I always preferred blogger to get ideas, because its provides more information over the books & here I gathered more precious skill from the professional, thanks for taking your to discussing this topic.
ReplyDeleteRegards,
Best JAVA Training in Chennai|JAVA Training
Useful Info
ReplyDeleteUnic Sol is the best java training in Hyderabad with job placements. Along with java training full stack, mean stack, angular & testing tools training is provided by industry experts. We are the best java training in Hyderabad.
I accept there are numerous more pleasurable open doors ahead for people that took a gander at your site.consulting services in dubai
ReplyDeleteHats off to your presence of mind. I really enjoyed reading your blog. I really appreciate your information which you shared with us. company registration services india
ReplyDeleteI really enjoy the blog article.Much thanks again.
ReplyDeletedata scientist course in hyderabad
data science training india
Thanks for sharing this blog . Keep sharing Java Course in Pune
ReplyDeleteThanks for sharing this blog . Keep sharing Web Development training in Kolhapur
ReplyDelete